
Are you tired of having to work with more than a dozen open apps at the same time to accomplish your daily tasks? Navigate from your inbox to your business apps? Having to dance with the Alt-Tab buttons to jump from one app to another to a point where you even forget where you are. Well, let me suggest to you the Outlook app with the Dynamics 365 integration.
This article will explain to you why to use the Outlook app with Dynamics 365. It will also show you how to link your Outlook account to your Dynamics 365 and how to use its integration with your Outlook app.
Why use the Outlook app with Dynamics 365?
If you are like me, the first app that we open and that we use every weekday (and sometimes on the weekend) is my inbox. Microsoft is fully aware of this reality and for this reason, it has integrated many applications into its software. The integration of Dynamics 365 to Outlook is a perfect match!
This integration allows you to:
1) Save time
2) Improve your work efficiency
3) Centralize your work in one app
So, everything is in the right place logically and intuitively. For our client, it is very important to be able to use the Outlook app, That is why Outlook App is an interesting factor for the subscription to the Microsoft Dynamics 365.
For technological forefront enterprises, it could even be possible to integrate artificial intelligence into your email management like taking orders or scheduling appointments. We will explore more on this subject in one of our next articles. Stay tuned!
How to link the Outlook account to Dynamics 365?
The first steps have to be taken inside Dynamics 365 app. You need to have a Dynamics 365 license and an ‘’Administrator’’ security role.
Step #1: The Office 365 Portal
Open a session in your Office 365 with this link.

Step #2: The Office 365 Dashboard
You are now on the Office 365 dashboard. Choose the Dynamics 365 icon.
If you don’t see the icon, check with your Office 365 administrator that you have been assigned the right license.

Step #3: The Selections of the Dynamics 365
Click on the tile that represents the Dynamics 365 instance. It is important to note that the name of your instances will most definitely be different than what you see in the image below. So, make sure to choose the right instance. The good practices recommend using the instance ‘’Sandbox’’ to make your connection test. After that, simply repeat the same process in the production environment.

Step #4: The settings
Once inside your CRM Dynamics 365, click on “Settings” and “Email Configuration.”

Step #5: Email configuration
Select the option “Mailbox.”

Step #6: Identify the active mailboxes
Change the view by clicking on the right (the arrow pointing at the bottom) of the title “My mailboxes” and select “Active mailboxes.”

Step #7: Choose the email box to link to Dynamics 365
Select the user in the list for which you want to activate the mailbox and double click on his or her name.

Step #8: Outlook mailboxes configuration
– Make sure that the configuration is identical to the image below
– Click on “Approve” the email address (Step 1 in the image)
– Click on “Test and Activate” the mailbox (Step 2 in the image)
– The result will be displayed in these fields (Step 3-4-5 in the image)

Tips: If the test fails, you can see the detail of the failure by clicking on “Alerts” in the right band of the form (Step 1 in the image).

Step #9: The Dynamics 365 apps for Outlooks
Once all the mailboxes have been approved and tested, we have to establish the link between the CRM and Outlook by activating the Outlook app.
Click on Settings and Dynamics 365 App for Outlook.

Step #10: Starting up the Microsoft Dynamics 365 app for Outlook
Once all of the mailboxes have been approved and tested with success, the email addresses will generate the eligible user list. Select all the qualified address and click on the “Add” button to add the app for the eligible users (step 1 in the image).
The app installation can take anywhere from 15 minutes to an hour in some cases.
If the installation is successful, you will see in the Status column “Add to Outlook” the green button and the two following columns will also have a “Yes” associated with the user name.

How to use the Outlook app
It is important to note that there are two versions of Outlook. There is the version that we can find on the Cloud that we call Outlook app. There is also the version that we call Desktop, which means that the version is installed locally on your hard disk. This guide has been designed for the Outlook app and even though the installation process is similar, there are still some variations.
Open the Outlook app
Go to your Office 365 portal and select the Outlook app.

You are now in the Outlook app.
To activate the app, select an email in your inbox and click on the Dynamics 365 logo, which will activate the Dynamics 365 app.

The Dynamics 365 app will try to determine if the email address exists inside the CRM. If the email address is nonexistent, the app will suggest that you create a new contact to avoid doubles. By clicking on the blue “+” button, the app will offer you the possibility to create a new contact or new lead. Depending on your choice, the app will ask you to fill out a contact or lead form. In the second case, when you save the form, the app will create a lead form in the CRM.

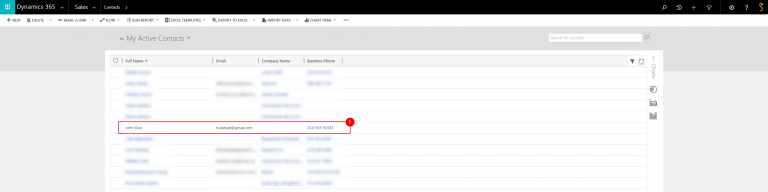
Here is the contact form for John Doe.
Once that contact has been created inside your CRM, you can track an email. This action of tracking an email allows you to link the activity flow of a form in your CRM. You only have to click on the “Follow” button, which can be found on the upper Dynamics 365 section of your app. It is important to note that this action has to be repeated for each email you want to track in your CRM.

If you replay an email that you have decided to track, the subsequent emails will be tracked automatically. The app will ask you to define the “Regarding.” The ‘‘regarding’’ is the file to which the email should be attached.
In the present case, I want John Doe’s email to be linked to the Gestisoft account’s file. Thereby, we can see that John Doe’s email is linked to Gestisoft’s account file. Thus, the email’s regarding is the Gestisoft’s account file.

The “change regarding” button will help you define a new regarding or simply cancel the tracking. It will also erase all the files that you have created by mistake without having to move to your CRM.
Once the email contact is known by your CRM, it is possible to create tasks, appointments, and make phone calls. You simply have to select the email that you want to create the activity with. Click on “Add activity” and select the type of activity you would like to create.
Here we want to make an appointment in the contact file of Simon Trahan. Choose a time-slot according to the situation and save the meeting.
Once the appointment form is filled, you only have to click on the contact of Simon Trahan. This action will make you move to his file inside your CRM.
The same logic can be applied if you want to create an activity like a phone call or a task.

In conclusion, this blog has shown you:
1) Why use the Outlook app with Dynamics 365
2) How to link the Outlook account to Dynamics 365
3) How to use the Outlook app
Liked what you just read? Sharing is caring.

May 25, 2026 by Kooldeep Sahye by Kooldeep Sahye Marketing Specialist
Fuelled by a passion for everything that has to do with search engine optimization, keywords and optimization of content. And an avid copywriter who thrives on storytelling and impactful content.

