
Dynamics 365 is a complete CRM solution that lets you manage your contacts and streamline all your marketing efforts efficiently. With its excellent tools, unified database, and AI-backed automation and analytical insights, it enables you to simplify the administrative process behind many business operations like sales, marketing, and customer service.
One such tool that makes your life a lot is the workflow automation tools from the Dynamics 365 CRM tool. Here is a brief overview of the workflow tool and how you can use conditional branches in the Dynamics 365 workflow to automate your business processes effectively.
Not ready to dive in yet?
Book a free consultation with our Dynamics 365 CRM experts and discover how we can help you.

What Is a Workflow?
A workflow is a series of sequential steps, actions, or tasks carried out as part of a business process. Each step in a workflow execution may consist of a data transfer or transformation. Most business processes can be defined as a proper set of repetitive tasks formed into workflows. Each workflow will thus have a set of data and execution path that explains how the data is used at each stage of the workflow.
For instance, every time a sales operator places an order, the order process can be defined as a workflow. An order workflow can include steps like checking the inventory, placing the order, manager approval for the order, and then once approved, the order is placed with the vendor, and the relevant details will be updated in the database.

There are many different types of workflows, such as process workflows, case workflows, and project workflows.
By automating workflows, you get to save a lot of time involved with manual data updates and approval processes. Workflow automation can also decrease manual errors and set up a consistent and standard process that will be easy to optimize and improve for better productivity.
What Is A Workflow In Dynamics 365?
A workflow in Dynamics 365 is a feature that lets you set up and configure workflows related to your CRM. It enables you to create automated workflows for various processes, settings, scope, and trigger options.
In Dynamics 365, you can create both asynchronous and synchronous workflows.
- Asynchronous workflows use the Windows service as the host application and are run on the Windows CRM server.
- Synchronous or real-time workflows are easier to create and can be used by anyone, even without programming knowledge. These can be used to execute a predefined set of tasks based on an event trigger. Operations can be executed either pre, post, or even during the core operation.
To create workflows in Dynamics 365, you can follow the below steps:
- Go to Processes > New
- And define the workflow properties by selecting the category as workflow, giving a proper name for the process and the entity records.
- Once created, you can define the scope of the workflow.
- Real-time workflows cannot be executed before records creation and after record deletion.
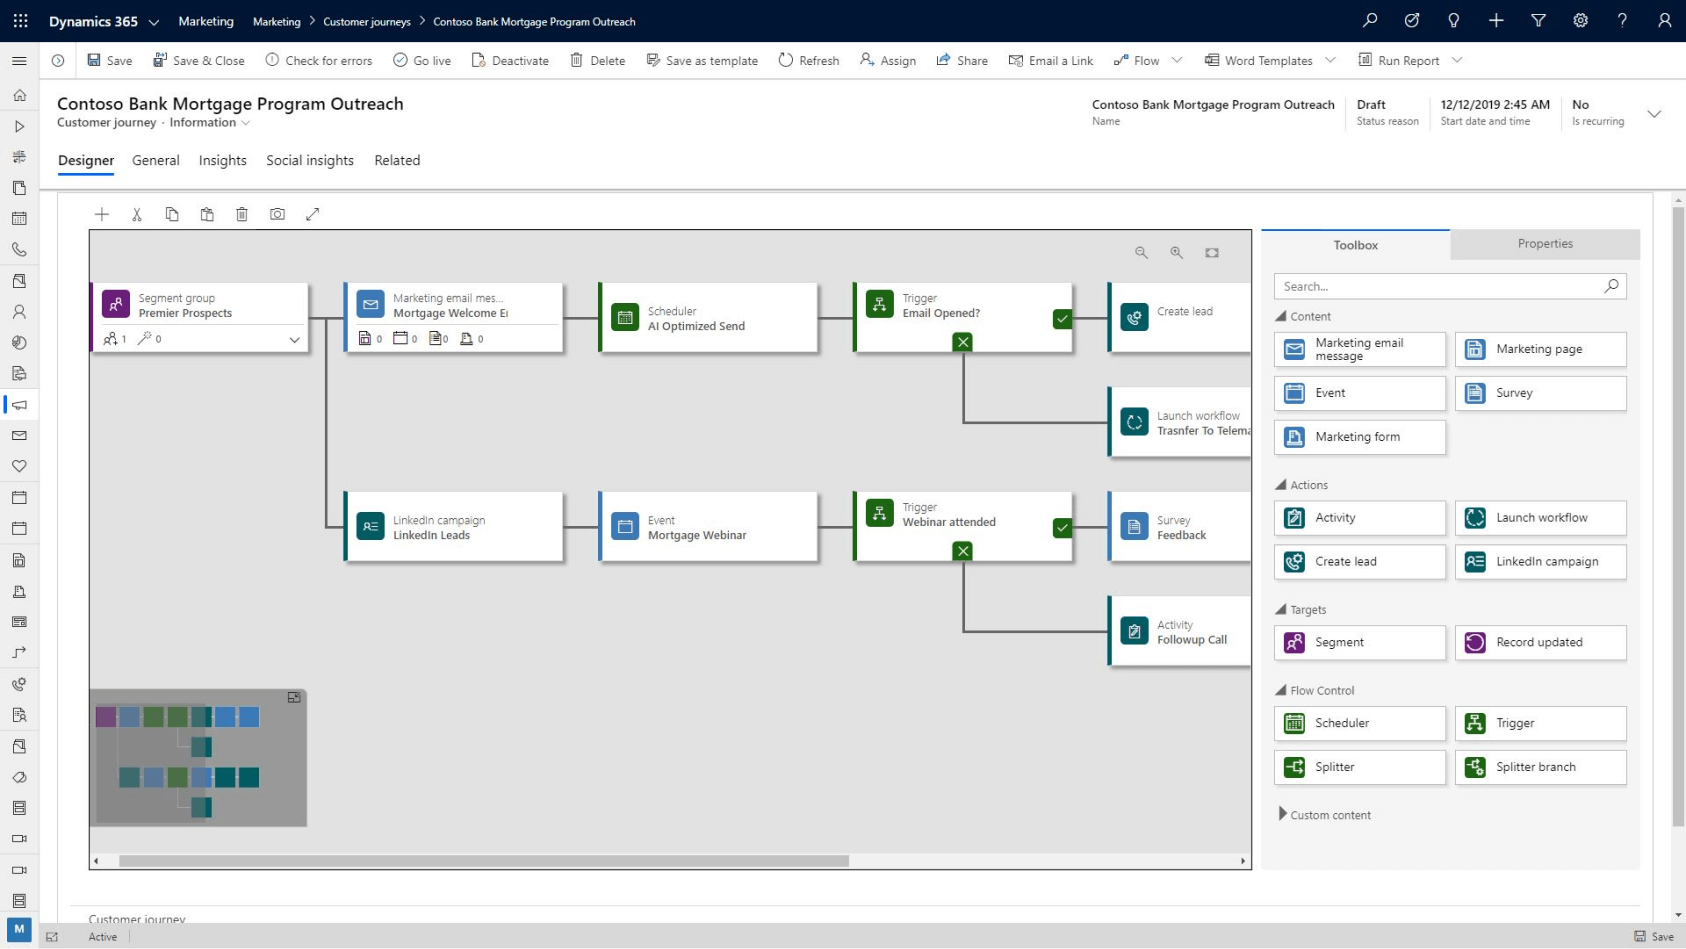
When to Add a Conditional Branch to a Dynamics 365 Workflow?
The next step is to customize your workflow steps by adding the business logic for that particular workflow. A standard workflow includes:
Stage
Stages refer to the various breakdown units of tasks within a workflow. These are mainly used for better organization and documentation purposes.
Check Condition
This is a conditional statement using the if predicate to select how the workflow flows from a particular point. For instance, in the case of the order placement workflow, a condition can be made to check if the manager approves the order or not. If the order is approved, the order is placed with the vendor. If not, the records are updated, and the process will end.
The various paths that the workflow takes after a condition is called a branch.
And by using constructs like Else if and Else, you can create additional, conditional branches
Wait Condition
Similar to a check condition, a wait condition is a construct that specifies that the workflow has to wait for a particular amount of time before proceeding to the next step.
- Create Record: This step creates a new record based on any of the data used within the workflow.
- Assign Record: This step can be used to change the owner of an existing record.
- Send Email: This step will fire an email using an existing template or any predefined draft specified in the workflow.
- Start Child Workflow: This step creates a child workflow and lets you split up the parent logic into additional steps based on any conditions
- Perform Action: This step is used to start a task process and can call the task function using code.
- Change Status: This step lets you change the record status to toggle from active to inactive or Open to closed
- Stop Workflow: This step indicates the end of the workflow.
First, create a check condition before a conditional branch in the Dynamics 365 workflow
With the 2015 CRM spring release, the Dynamics 365 workflow feature lets you add conditional checks to customize your business logic. For example, you can add check conditions using logical operations like OR and AND and thus group your conditions for more powerful workflow branching logic.
For creating new branches, you need to add a logical “if (condition) then” statement to your check condition. You can also use several operators like equals, does not equal, contains data, does not contain data, under and not under to make the check conditions with which you want to check the data.
How to Create a Check Condition?
Here are the steps to create a check condition:
- Go to the Workflow Editor and click on Properties. In the properties form, go to the left pane and click on Basic settings
- Enter the name of the conditional decision you want to perform and click on Add condition
- Enter the condition as an if-then statement. You can also add additional conditions as required.
- Once added, you can test the conditions by clicking on Test and use the Test Workflow condition form to perform testing on your conditional statements.
How to Create a Conditional Branch in Dynamics 365 Workflow?
You can specify the conditional branch on the else part of the check condition. It acts as the logical “else if then” statement after a previous if statement. This helps you add additional conditions and steps to be executed when the previous check condition fails.
How to Create a Conditional Branch?
Follow the same steps by creating a check condition, and add additional conditions in the condition part to add the conditional branches.
The workflow tool from Dynamics 365 is a powerful tool capable of transforming your business and enhancing your productivity levels to a great extent. But you need to understand how you can optimize your business processes and how to translate them into the workflow definitions. At Gestisoft, we have the expertise you need to equip yourself with the skills and knowledge to configure efficient workflows. Get in touch with us and let's talk about your business processes!
Liked what you just read? Sharing is caring.

October 05, 2021 by Kooldeep Sahye by Kooldeep Sahye Marketing Specialist
Fuelled by a passion for everything that has to do with search engine optimization, keywords and optimization of content. And an avid copywriter who thrives on storytelling and impactful content.

