
Dynamics 365 Marketing software is a particularly formidable solution for organizing an event or webinar. However, this feature is sometimes problematic for beginners. How to proceed step by step? This guide will answer that frequently asked question.
Why organize an event with Microsoft Dynamics 365?
Microsoft Dynamics 365 is a CRM and ERP software suite for professionals. Among the many features provided by these programs, the creation/management of an event is one of the most popular “tools”.
Want to learn more about this solution? Here are the specific characteristics of planning an event through Dynamics 365:
- Managing the registration of the various actors linked to an event
- Centralizing and sharing all essential information
- Running the logistics aspect (reservation and allocation of hotel rooms)
- Managing event locations
- Handling sponsors
- Analysis of a “Customer opinion” survey
In addition, Dynamics 365 allows simultaneous delivery of webinars. The presentation of attendance statistics is of course provided. Finally, this suite designed by Microsoft will also allow you to publish an event website. The latter will be able to benefit from each above-mentionned feature.
In short, Dynamics 365 is a formidable solution for managing and planning a professional event. However, the many tools available through the program interface can confuse beginners. The rest of this article will take you through step by step.
The complete guide to planning an event with Dynamics 365
1st Step: Creating an event folder
As a first step, it is essential to create a dedicated folder for your event. Ideally, this will include all relevant information.
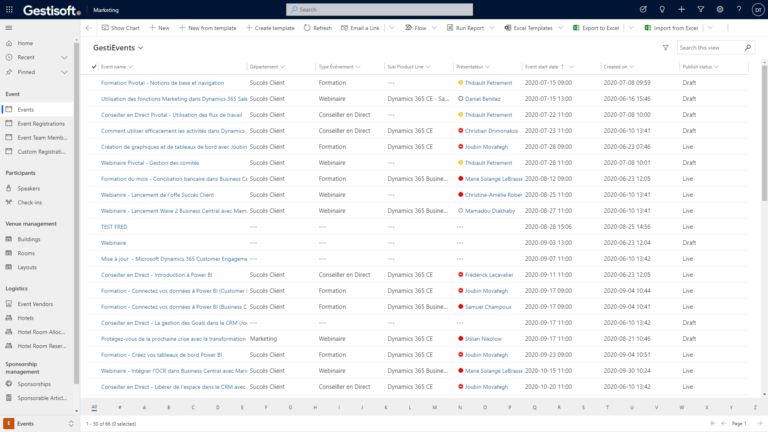
From the main interface of the Microsoft Dynamics 365 program, go directly to the section named “Events” located in the left column. After selecting this category, you will find a “New” tab. A new window will then present you with multiple options relating to the organization of your event.
Are you a beginner? Dynamics 365 offers pre-designed templates to simplify the management of certain settings. Nevertheless, these can be personalized according to your preferences.
When creating an event folder, several pieces of information (marked with a red asterisk) will be required. These will be automatically shared with each actor who can access your “Event” via a workflow. If in doubt, this data may be modified later.
After saving your file, several tabs will be available to set each detail related to your event.
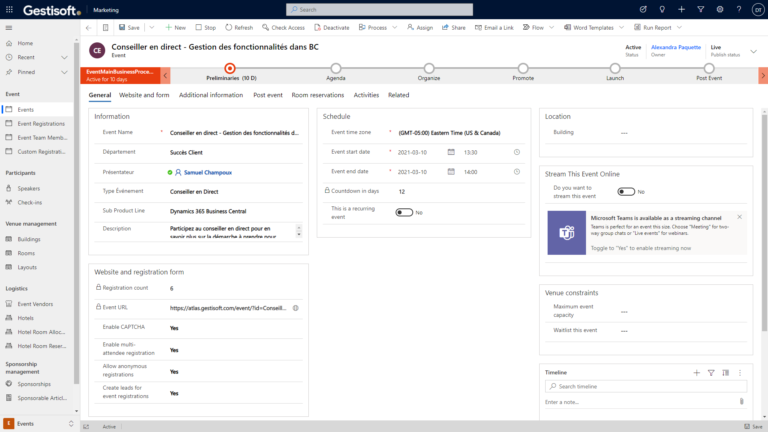
The “General” section
The “General” tab will allow you to set or modify a lot of essential information such as:
- The name and type of event
- The format (webinar, simulcast or publication of a website)
- Setting the maximum number of registrations and records
- Adding an external URL address (dedicated to your event)
- The link associated with your Dynamics 365 event
- Creating leads
- The website design (including your event ID, the use of CAPTCHA codes, online payments, simultaneous registration, developing a flyer and allowing anonymous registrations)
- Setting time information and the timeline
- Geographic targeting and any location constraints that are associated with your event
- Managing a waitlist
- Setting up webinars
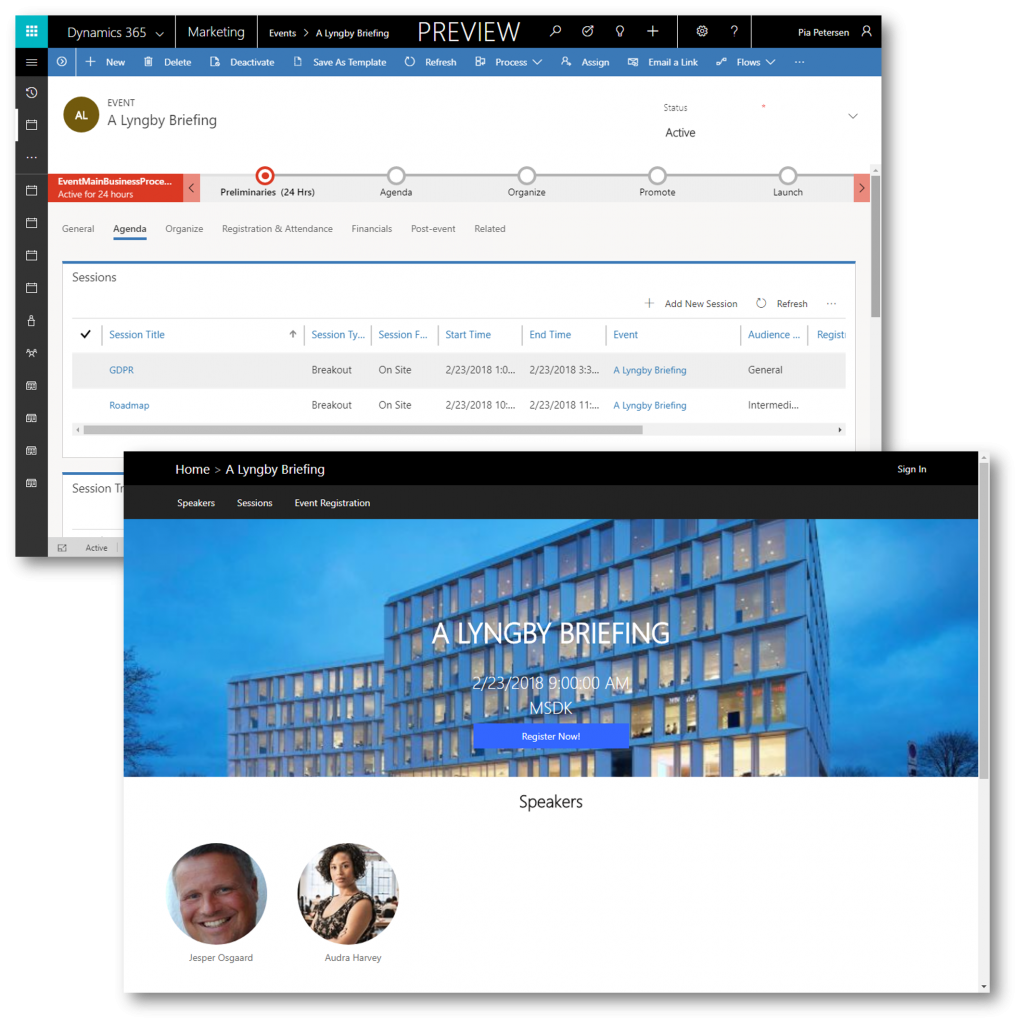
The “Agenda” section
The “Agenda” section will allow you to set the following information:
- The authorization granted to actors who wish to create their own agenda
- The date and time scheduled for each session
- The setting of tracks (useful for promoting your events)
- The assignment of your speakers’ roles
- The dissemination of information relating to sponsors
The “Registration & Attendance” section
The “Registration & Attendance” tab offers relevant statistics to check the list of people registered or to handle any cancellations. Here you will find:
- The Pass section (dedicated to creating tickets)
- The setting of custom fields via your registration form
- The list of people registered for your event and Internet users placed on a waiting list
- Data concerning a prior “event”
- The cancellations recorded
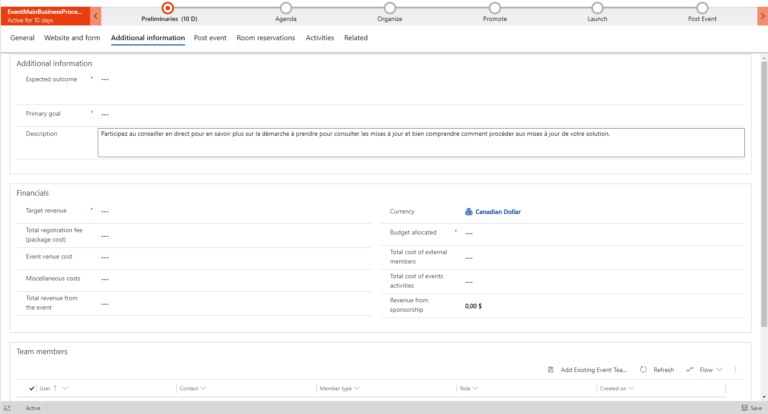
The “Additional Information” section
The “additional information” section is reserved for specific instructions and data. This will refer to the financial aspects or the assignment of an internal team.
The “Post-event” section
The “Post-event” tab will allow you to collect certain key information from people who participated in your event. The “Customer Opinion” tool will ensure this process.
2nd Step: Setting up a team
The second step of this guide concerns the setup of a team. This involves each external actor in the organization of your event. Perfect management of the assigned roles is essential to ensure optimal results.
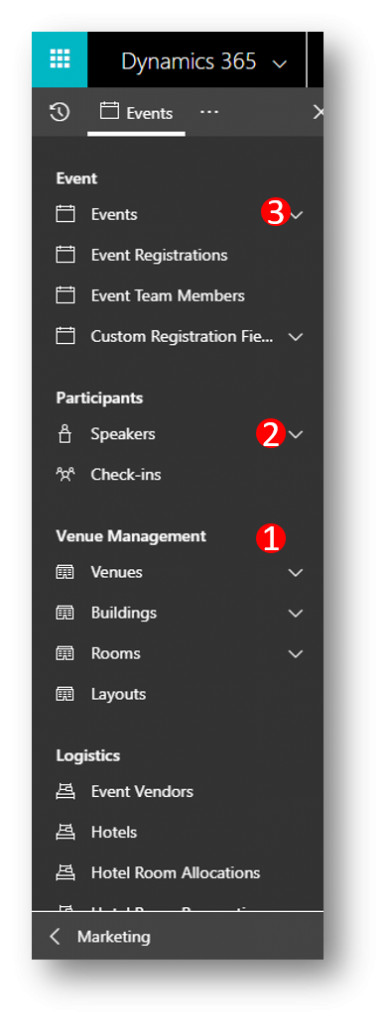
Go directly to the “Events team members” section accessible from the “Events” tab of Microsoft Dynamics 365. You will find all the folders relating to your team there. Each user will be designated:
- As a user if they have a Dynamics 365 license
- As a contact (if applicable)
3rd Step: Managing speakers/sessions
Is your team perfectly set? It is now time to set up your next sessions and designate the speakers.
The monitoring (internal or external) of sessions will enable you to group several sessions based on specific content or audience. This strategy is a real opportunity to ensure optimal management and results.
Finally, the “Speakers” section (available from the “Events” tab, then “Participants”) will allow you to manage each assignment.
4th Step: Setting up a pass
Dynamics 365 allows event managers to set up passes without any difficulty. Depending on your needs, this software allows you to create tickets ensuring total or limited access to your event. For that purpose, the Microsoft suite applies a system associated with QR codes. As a result, each Internet user who has completed the purchase of a pass will be assigned a unique digital file. This will be presented like a classic ticket upon entrance. The “Registration and Attendance” section will provide you with information on the number of passes sold or remaining.
You are free to set up this digital badge according to your preferences.
5th Step: Setting the event location
Finally, the last step relating to the creation of an event via Dynamics 365 is setting a location. The “Location Management” section available from the “Events” tab will allow you to model your locations. This will allow you to set the buildings, rooms and arrangements associated with your event.
In conclusion
The Microsoft Dynamics 365 suite is particularly effective in ensuring optimal organization of your event (s). The steps detailed in this article will allow you to assimilate the different features offered with this software.
Liked what you just read? Sharing is caring.

November 06, 2025 by Kooldeep Sahye by Kooldeep Sahye Marketing Specialist
Fuelled by a passion for everything that has to do with search engine optimization, keywords and optimization of content. And an avid copywriter who thrives on storytelling and impactful content.

